
Note: As of summer 2020 I no longer use Dubsado as my CRM, to learn more about what program I use now, see this post.
The first thing you need to do before using Dubsado
Recently I’ve been helping more clients streamline their processes and get them added to their chosen CRM. One thing that a lot of people don’t fully realize is how much time and work it takes to get a CRM set up. There’s so many moving pieces and depending on what you do and how you serve your clients you may have more pieces to figure out. A lot of people get overwhelmed when it comes to setting up a new program which is why they either never set one up, they set it up partially but because it’s not setup correctly they end up doing more work, or they hire it out but don’t take time to learn how to use it once it’s setup and then don’t use it its potential.
No matter how you get your CRM setup it’s going to take time and effort if you want it to work for you. Which is 99% of why I use one for my business.
What’s the difference between a CRM and a PMS?
One of the big questions I get asked is why I use both a CRM and a PMS when my CRM (Dubsado) has task boards to help with some project management. Personally I’ve found Asana to be more robust in the features because it is specifically for project management. Once I’d written out all of my processes I discovered that because my services have almost the exact same onboarding and offboarding steps, and the job itself varied from person to person, I could onboard all of my clients easily in Dubsado then set a task in Dubsado for myself to setup an Asana project where I’d then work from for the rest of the job, then I’d move the job back into Dubsado to offboard the client.
I’ve learned that I need to treat Dubsado like a CRM — CRM stands for Client Relationship Management, basically, it helps you manage the client side of your business. Then there’s a PMS — Project Management System (like Asana, Trello, Basecamp, Clickup). This helps you manage the project or task side of your business (and so much more, but I’ll dive into that in another post). A lot of people are wanting to treat their CRM like a PMS which can work for some people but for a lot of people it doesn’t, which is why I use both Dubsado and Asana.
The first thing you need to do to start using Dubsado
This is the #1 thing I see asked in the Dubsado Facebook group, how to get started. There are so many things and people want to just dive in and be set up. But honestly, it takes time and a lot of work if you want it to work for you (which is what we all want right??).
Besides the obvious of creating an account, the first thing you need to do is to write your processes down for all the services you provide. There are a lot of people who struggle with this because they’ll say that their processes vary from client to client. Mine do too, but I’ve discovered a way to make it work for me by using Dubsado to capture leads, onboard and offboard clients. The whole middle (the actual project) gets moved to Asana.
So before you dive into fun things like workflows and adding stuff into Dubsado, the first thing you need to do is write down your processes for each service. From the time they first contact you to your very last interaction with them (and any post-job tasks you do). Spending time writing this out and figuring out how everything is laid out will not only help you see gaps in your processes, but will also show you what your onboarding process is, what forms you need, what emails need to be sent, and what tasks you need to do to complete the job.
How to write out your processes
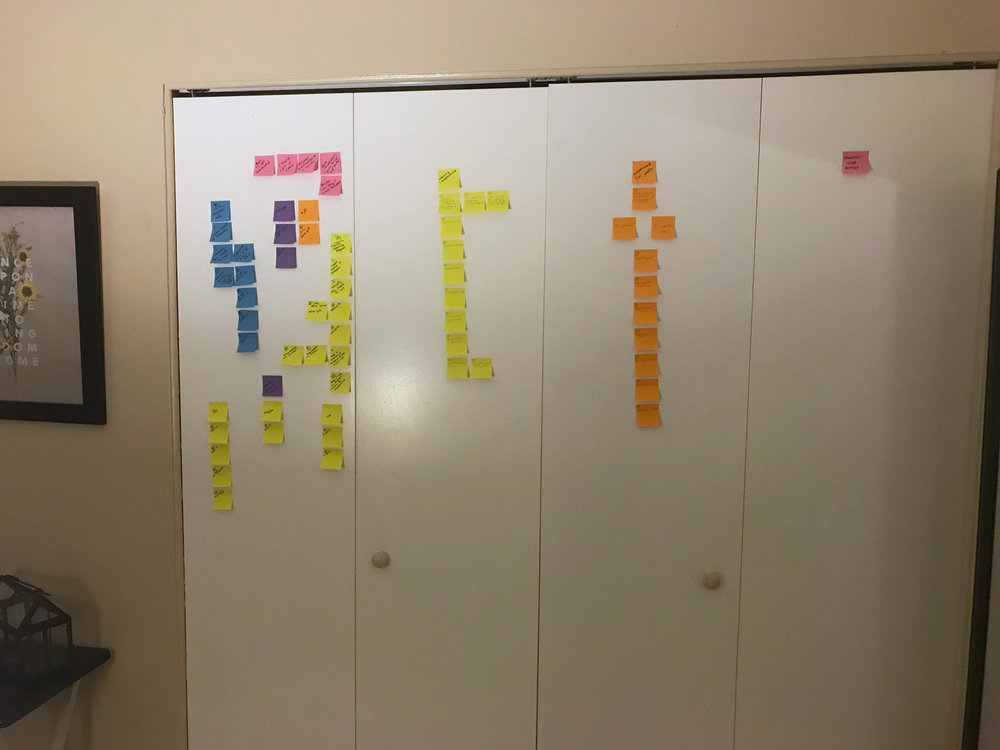
A few months ago I saw someone post in the Dubsado FB community how they wrote out their workflows, and it was simple and absolutely brilliant. What they did is they took sticky notes and a pen and on each sticky note they wrote out each step in their workflow. I loved that idea! As someone who mostly works using a computer, it was great to try something that was tactile, it really helped me when I wanted to rearrange my workflow to see if it made more sense somewhere else. I started using that process when helping clients create their workflows. Since I was the one streamlining and writing out their processes, I’d start by asking them to walk me through their process for each service from the time their client first contacts, then I’d follow the steps below.
- Choose one service and write out your whole process. Don’t forget to include things like what you’ll do if they contact you via Facebook messenger versus if they contact you through your contact form; what will you do if they ghost on you after you contact them, how many follow up emails will you have; when the job ends do you have any follow up emails (i.e. 3 months, 6 months, 1 year later) or any end of job tasks (i.e. write a blog post, share on social media, clean up project files and archive them).
- Go back through your process and look for gaps or places you can streamline or reorganize the order of what you do. Sometimes in the middle of a project we realize we wished we asked XX before you got to a certain step, now is the time to dissect your entire process and see if you should create an intake form that asks them XX so that by the time you get to a step you’ve already got that information. Or maybe you always wanted to write blog posts after a session but always forget to ask them for details on who they’re wearing so you can tag them on social media. For that you could create an automated post-session email that thanks them for a great session, reminds them of when they can expect to get their gallery, then asks them to reply to the email letting you know who they wore so you can add it to their blog post (and that you’ll let them know when the blog post is ready so they can share it with everyone!).
- Determine which parts of your process will need to be added into Dubsado. You can underline, circle, highlight or whatever you want to that step, you just want to be able to know what action is happening in that workflow. Here are the items that you’ll want to make note of:
- Contracts or sub-agreements
- Questionnaires/Forms
- Proposals
- Lead Capture Form (contact form)
- Canned emails
- Tasks
- On a separate paper write out all of those items that you just noted.
- Contracts – Graphic Design, Virtual Assistant, Website
- Sub-Agreements – Contract addendum, job termination contract, design proof, tutorials, project timeline
- Questionnaires – Design proof, discovery call questionnaire, review request, intake form
- Proposal – All services, design services, website services, virtual assistant services
- Lead Capture – general
- Canned Email – Initial contact, payments (payment reminders and payments received), end of the project, upcoming session, upcoming meeting, meeting recap + next steps, no response, proof, review request, schedule a call, welcome/onboarding
- Repeat for each service.
leave one here
comments